-
Apexlink
Real Estate
-
DLS
General Insurance
-
DMV
Government
-
Entiger
Fintech
-
GIS Mapping
Gas & Petroleum
-
HMS
Employee Benefit
-
HAWA
Government
-
Harley
Community
-
IHG
Hotel & Tourism
-
Sparkseeker
Humane Tech
-
Track Ninja
Sports
-
Response Vision
Disaster Management
- AI/ML Services
- Application Services
- Automation Services
- Cyber Security
- Chatbot Experts
- Data Analysis
- Data Warehouse Services
- Digital Commerce Services
- Digital Transformation
- Infrastructure Service
- Low Code/No Code
- Managed IT Services
- IT Support
- IT Consulting
- IT Outsourcing
- Mobile App Development
- IOS Development
- Android Development
- Cross Platform Development
- Gaming App Development
- Software Development
- System Design & Architecture
- Testing Services
- Web Development


 Blockchain
 Cloud Computing
 Infrastructure
Services
Infrastructure
Services Metaverse
 QA
Automation
QA
Automation UI/UX
UI/UX


Choosing the correct platform to create an application is among the developers' first and most important decisions. Once you have the platform lockded, it is time to start the setup process. This post will cover React Native app development project setup in detail, the various common issues that arise during the session, and the solutions.
What is React Native?
React Native is an open-source cross-platform created by Meta, which is widely used for building mobile apps. Developers can use the platform to develop applications on several different platforms like Android, iOS, and Windows.
React components wrap existing native code and interact with native APIs via React’s declarative, UI paradigm, and JavaScript. If components do not exist, developers can use third-party libraries of npm or npx that also help create apps like native feel.
People use React Native for mobile application development because it has one of the largest communities, which can provide multiple solutions for any issue.
React native developers only need to use JavaScript for code writing. It is a massive contrast to Native development, where developers have to write native code in java or Koltin for android, objective c, or swift for iOS. It is single-threaded in nature. In its rendering process, rather than having multiple processes occur simultaneously (multithreading), other components have to wait until one component is rendered.
React Native App Development – The Setup for the Project
First, we start with the setup of react native for creating a mobile app. Follow these steps if you need to build native code for your project. Make sure that you are open terminal with Rosetta like this:
React Native App Development – For Android setup, follow these steps:
Step 1. First, React Native developer needs to install globally Homebrew using this command:
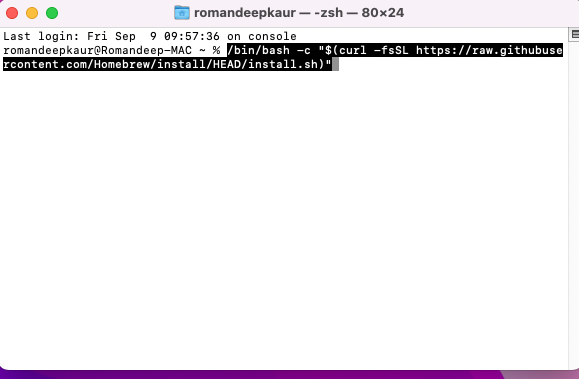
/bin/bash -c "$(curl -fsSL <a href="https://raw.githubusercontent.com/Homebrew/install/HEAD/install.sh">https://raw.githubusercontent.com/Homebrew/install/HEAD/install.sh</a>)" Step 2. Run the following commands in a Terminal after installing Homebrew:
brew install node
brew install watchman
Note: If you have already installed Node on your system, make sure it is Node 14 or higher.
Step 3. Run the following commands globally in a Terminal:
brew tap homebrew/cask-versions
brew install --cask zulu11
Note: If you have already installed JDK on your system, make sure it is JDK 11 or newer.
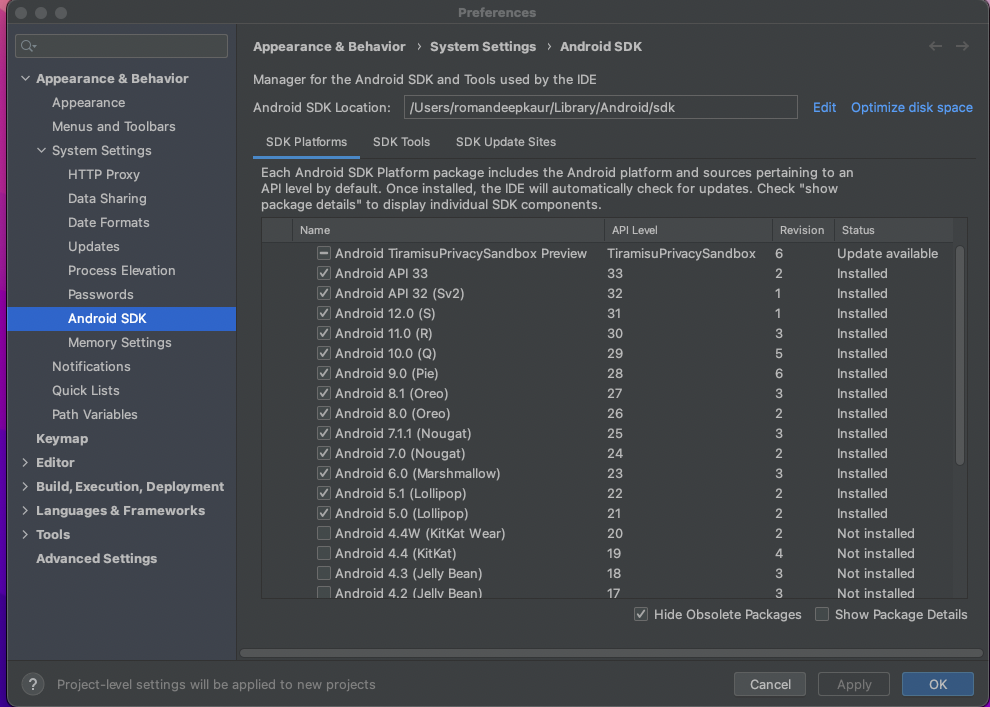
Step 4. To set the development environment of android, make sure to download and install these:
- Android SDK
- Android SDK Platform 31
- Intel x86 Atom_64 System Image or Google APIs Intel x86 Atom System Image or (for Apple M1 Silicon) Google APIs ARM 64 v8a System Image
Note: The SDK Manager can also be found within the Android Studio "Preferences" dialog, under Appearance & Behaviour → System Settings → Android SDK.
Step 5. Configure the ANDROID_SDK_ROOT environment variable:
Add the following lines to your $HOME/.bash_profile or $HOME/.bashrc (if you are using zsh then ~/.zprofile or ~/.zshrc) config file:
export ANDROID_SDK_ROOT=$HOME/Library/Android/sdk
export PATH=$PATH:$ANDROID_SDK_ROOT/emulator
export PATH=$PATH:$ANDROID_SDK_ROOT/platform-tools
To create and open .bash_profile file, follows these steps:
- Open Launchpad > Other > Terminal.
- Type in the following command to move the home directory and press Enter:
cd ~/- Input the below touch command to create the bash_profile on Mac:
touch .bash_profile- You can use the following simple command line to open and edit the bash_profile:
open ~/.bash_profileReact Native App Development – For iOS setup follow these steps:
To create the setup on iOS, the steps will vary. These are listed below:
Step 1: First, install globally Homebrew using this command:
/bin/bash -c "$(curl -fsSL <a href="https://raw.githubusercontent.com/Homebrew/install/HEAD/install.sh">https://raw.githubusercontent.com/Homebrew/install/HEAD/install.sh</a>)" Step 2. Run the following commands in a Terminal after installing Homebrew:
brew install node
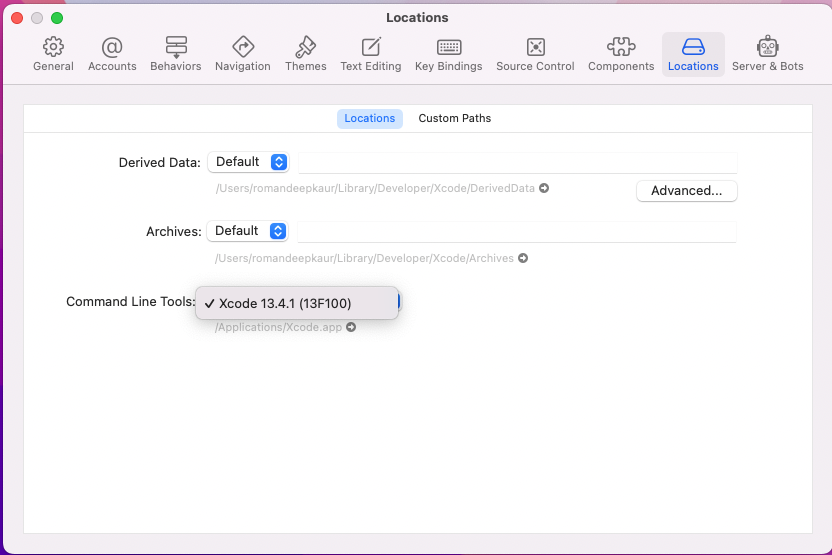
brew install watchman Step 3. Install XCode via the Mac App Store. Moreover, you will need to install the XCode Command Line Tools. Open XCode, then choose "Preferences..." from the XCode menu. Go to the Locations and install the tools by selecting the most recent version in the Command Line Tools dropdown.
Step 4. To install Cocoa pods, use the command:
sudo gem install cocoapodsNote: Mac M1 is not directly compatible with Cocoa Pods. If you are getting issues when installing pods, you can solve it by running these commands:
sudo arch -x86_64 gem install ffiNote: React Native has a built-in command line interface. Rather than installing and managing a specific version of the CLI globally, we recommend you access the current version at runtime using npx. With npx command, the current stable version of the CLI will be downloaded.
Create a new Application with these commands:
npx react-native init <ProjectName> npx react-native init <ProjectName> --version X.XX.X (with specific version you can create project)
Run Application on the physical device
For android device: Yarn run android or npx react-native run-android
For ios device: Yarn run iOS or npx react-native run-ios
Seven Common Issues May Get When Running Apps on Device
When you create the initial setup for the first time, some issues might arise. Here is a list of common issues that react native mobile app development experts can face while creating the setup, along with their solutions.
- App installs debug error for android device.
Solution: run these commands in your project’s terminal:
export ANDROID_SDK_ROOT=$HOME/Library/Android/sdk
export PATH=$PATH:$ANDROID_SDK_ROOT/emulator
export PATH=$PATH:$ANDROID_SDK_ROOT/platform-tools
2. If you have not selected command line tools, it will show an error on Xcode when you start running the app on iOS.
Solution: Make sure that you select command line tools.
3. Development Server Error in React Native:
Solution: Open a new terminal with the project’s directory and hit the command ’npm start’
4. If you are getting a JS bundle issue on iOS, that means could not connect to the metro server
Solution: Make sure devices are connected with the same network
5. Sometimes we are getting issues ADB devices not found. It means that when we run the app on the device, the device is not found.
Solution: Resolve it by using this command:
sudo adb kill-server sudo adb start-server6. Sometimes we open the project or app on direct android studio then we get this issue:
java.io.IOException: error=2, No such file or directoryjava.io.IOException: Cannot run program "node" (in directory "/Users/username/foldername/projectname/android"): error=2, No such file or directory
Solution: To resolve it, follow this command on the terminal:
open -a /Applications/Android\ Studio.app7. Sometimes we are getting ‘unknown error’ or cache issue, to resolve it follow command:
Solution:
npx react-native start --reset-cache (with terminal)
Xcode -> Product -> Clean Build Folder (IOS XCode)
Android Studio -> Build -> Clean Project (Android)
Benefits of Using React Native Web and Mobile Development
If you are still wondering if React Native is the right choice for you, consider these benefits of the platform:
- Relies on JavaScript
- The Hot Reload Feature, which makes faster coding possible
- The Codebase has provisions to create apps for multiple platforms
- Code reusability is available for future projects
- Among the React developer tools, the biggest one is the highly active and supportive community
- It makes testing the product faster
- Offers a fantastic performance
- Generally, it costs less to create a React Native application
- You can get React Native Updates at regular intervals
How Long Can a React Native Project Take?
A React Native Project can take between two weeks to a couple of months. For Native applications, the timeline can vary from one week to around a month. However, as Native applications only work on one platform, creating the same app for different platforms will take more time. Depending on how many platforms you want the application to work on, the project length will change.
If the requirements of the project change quickly, expect more delays in receiving the final deliverables.
Overall, several factors determine the time it takes to finish a React Native project and a Native project. If your business wants to create a more inclusive environment, opting for React Native development services is better.
React Native V/S Flutter
Now, if you are a new developer looking for the best technology to use for website development, then you must consider React Native performance vs. Flutter. Both Flutter and React Native can create cross-platform applications.
Flutter
Flutter app development uses Dart language, which allows for the quicker compilation of code than JavaScript. Also, its standard display animation is 60 fps. Google Flutter does offer high performance, but there are still some common problems that can affect the rate. Here, you can follow these recommendations.
- Optimize performance using deferred loading and tree shaking.
- Improve performance using image placeholder, disabled navigation transitions, and pre-caching.
- Develop Flutter widgets
React Native
Written in Native and JavaScript languages, React Native apps use the JS bridge architecture for communication. Hence, React Native apps can be slower than other tools.
In performance, React Native development company and developers will tell you that React Native is better than Flutter. But the other benefits of the cross-platform framework from Google makes it worth the sacrifice.
You can visit Flutter vs React Native post to learn more about the difference between the two platforms.
Final Thoughts:
React native app development can become a tedious task that requires significant information. Businesses can hire a custom software development company to take on the project to reduce delivery time. So, if you are stuck and need to create an application, get in touch today.